

By using store-bought pastry dough and canned apple pie filling, these Apple Pie Danishes are so easy to make. But you would never guess how easy they are to make by tasting them. They are flaky and buttery, with sweet apple pie filling and crispy streusel topping. Enjoy!
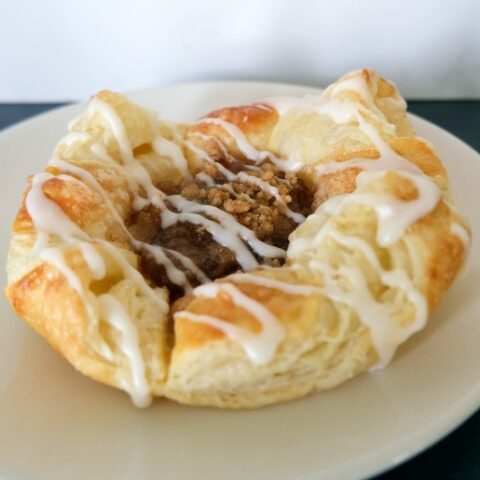
Apple Pie Danish
Flaky, buttery pastry filled with sweet apple pie filling and crunchy streusel topping. Perfect for breakfast or a tasty snack.
Ingredients
Streusel Topping
- 2 1/2 tablespoons flour
- 1 tablespoon + 1 teaspoon brown sugar
- 1/8 teaspoon cinnamon
- 1 tablespoon butter, softened
Danish
- 3/4 cup apple pie filling (I recommend dicing the apple slices into small pieces)
- 1 egg
- 1 package puff pastry
Glaze
- 2/3 cup powdered sugar
- 1 tablespoon milk or water
- 1/4 teaspoon vanilla
- Pinch salt
Instructions
- Preheat the oven to 350°F. Cover 1-2 baking sheets with parchment paper, set aside.
- Mix flour, brown sugar, and cinnamon. Use a fork to cut in the softened butter until crumbly.
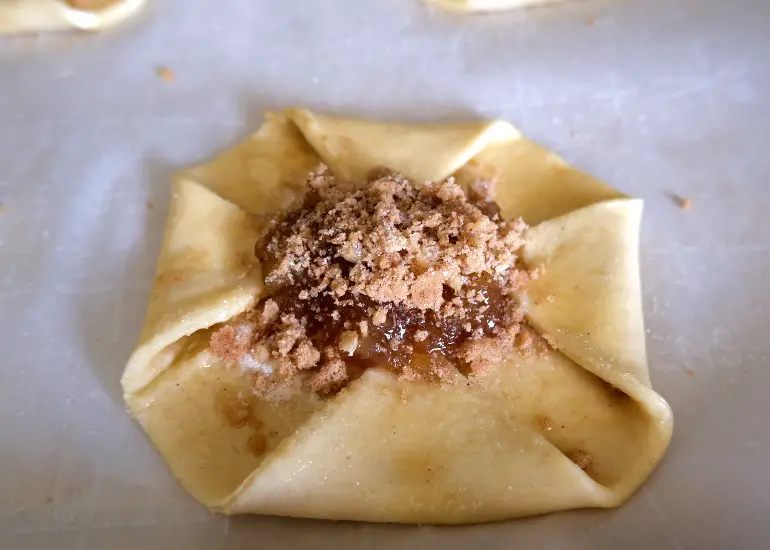
- Cut pastry sheets into squares. You should have 8 squares. Lightly brush water on the corners of pastry squares and fold in the corners, about 1 inch in (see pictures below for reference).
- Place 1 1/2 tablespoons of apple pie filling in the center of the pastry sheets (avoid placing it on the folded corners).
- Beat egg and brush onto any exposed pastry. Sprinkle with streusel topping.
- Place pastries onto a parchment-paper-covered baking sheet, about 2-3 inches apart as they puff up quite a bit. Bake for 15 to 20 minutes until golden brown. Remove from the oven and allow to cool for 3-4 minutes before placing on a cooling rack to cool for another 10 minutes.
- While the pastries cool, mix powdered sugar, vanilla, milk or water, and salt. Whisk together until smooth.
- Use a fork or spoon to drizzle over the top of the pastries. For a more even look to the glaze, place in a piping bag or a small zip-top bag with the tip cut off and pipe over the top of the pastry.
- Serve fresh.
Notes
Either store-bought or homemade apple pie filling can be used. This recipe also works well if you use peach or cherry pie filling.
Nutrition Information:
Yield: 8 Serving Size: 1Amount Per Serving: Calories: 104Total Fat: 3gSaturated Fat: 1gTrans Fat: 0gUnsaturated Fat: 2gCholesterol: 27mgSodium: 54mgCarbohydrates: 17gFiber: 0gSugar: 13gProtein: 1g
Nutrition information is an estimate only.
Make sure to leave plenty of room for the edges of the pastry to puff up once the pastry bakes.
If you want to try some other amazing pastries, I recommend these lemon cheesecake hand pies or apple pie danishes.
Storage
Strawberry cream cheese turnovers are best the day they are baked but will last 2-3 days if stored in an airtight container in the fridge.
What Is Puff Pastry?
Puff pastry is a flaky, light, crispy pastry. It is made by alternating layers of dough and butter in a process called “lamination.”
The butter between the thin sheets of dough helps keep the dough layers separate. The water in the dough and the water in the butter turn to steam while baking.
This steam puffs up the sheets of dough and then evaporates off (which is why baked puff pastry is flaky and airy without a lot of moisture). This is where puff pastry gets its name, from how much the pastry puffs up as it bakes.
If you like this peach pie for one recipe, let me know! Or if you’ve made the recipe let me know how it went. I’d love to hear from you in the comments. Happy baking!


