
")
I was first introduced to these bars by my mother-in-law. I had never tried them before, but it was definitely love at first bite! This is a fun twist on the traditional recipe. A crispy graham cracker crust, chocolate, and butterscotch chips in a gooey filling all topped with toasty coconut. Once you’ve tried them, you’ll never go back. Enjoy!
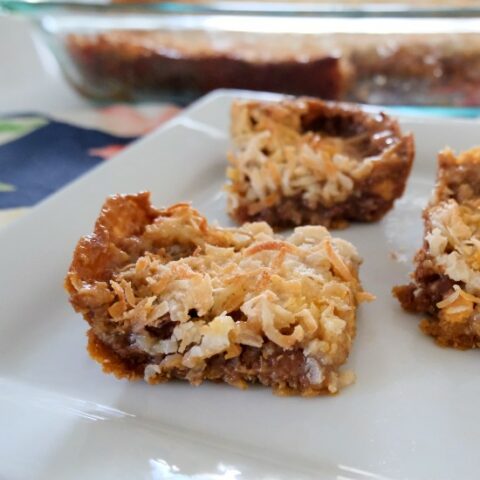
Hello Dollies (7-Layer Bars or Magic Bars)
Packed with chocolate and butterscotch chips covered in a gooey filling and topped with toasty coconut. You can't go wrong with these easy, delicious bars.
Ingredients
Crust
- 3/4 cup all-purpose flour
- 1 cup graham cracker crumbs (about 12 squares)
- 1/2 cup butter (melted)
- 1/2 cup brown sugar
- 1/2 teaspoon baking soda
Filling
- 1 1/4 cup milk chocolate chips
- 3/4 cup butterscotch chips
- 1 (14oz) can of sweetened condensed milk
- 1 1/2 cups sweetened shredded coconut
Instructions
- Preheat oven to 350 degrees Fahrenheit. Grease a 9x13 glass pan and set it aside.
- In a medium bowl, mix flour, graham cracker crumbs, butter, brown sugar, and baking soda. Mix thoroughly, then press into the greased 9x13 pan.
- Evenly sprinkle the crust with chocolate chips. Then sprinkle the butterscotch chips over the chocolate chips.
- Pour the sweetened condensed milk over the top of the chocolate and butterscotch chips until uniformly covered.
- Scatter the coconut over the top of the sweetened condensed milk, so it is completely covered.
- Bake for 20-25 minutes until the coconut is toasted and the edges are golden brown and bubbling.
- Let cool, approximately 2 hours.
Notes
You can also substitute peanut butter chips for butterscotch chips.
Many versions of these bars also call for nuts. If desired, add 3/4 cup of slivered almonds, walnuts, peanuts, or pecans.
Nutrition Information:
Yield: 20 Serving Size: 1Amount Per Serving: Calories: 219Total Fat: 12gSaturated Fat: 8gTrans Fat: 0gUnsaturated Fat: 3gCholesterol: 15mgSodium: 123mgCarbohydrates: 26gFiber: 1gSugar: 19gProtein: 2g
Nutrition information is an estimate only.
If you’re looking for another easy bar recipe, I recommend my Easy S’more Bars!
Storage
Magic Bars, 7-layer bars, or Hello Dollies will last for 3-4 days at room temperature in an airtight container and up to 1 week in the fridge. They also freeze well. Store for 3-4 months in the freezer. Make sure to store with parchment paper between the bars so they don’t stick together.
A Fun Twist on Hello Dollies
Now, I know that these aren’t the most traditional version of Hello Dollies. Typically the crust contains only butter and graham crackers. However, I found that this led to a crumbly crust that didn’t hold together well. My crust holds together much better and has a better flavor than traditional graham cracker and butter crust.
I know I have also broken the cardinal rule of Hello Dollies. For traditional Hello Dollies, you always put the sweetened condensed milk on top. However, I found that putting the coconut on top gives you extra texture and flavor from the coconut toasting in the oven.
Dairy-Free, Vegan Hello Dollies
Hello Dollies can be made dairy-free and vegan pretty easily. Simply replace the butter with vegan butter and use coconut sweetened condensed milk. You can use either dairy-free chocolate chips or substitute white chocolate chips for milk chocolate chips.
If you made this recipe, I’d love to hear about it! Please leave a review or a comment letting me know how things turned out. Happy baking!


